-

Let’s Socialize


Categories


Search
Subscribe by Email
-
Recent Posts
Follow me on Instagram @ NotYourAveragePlainJaneBlog
Archives
Author Archives: Sabrina
Dr. Martens: Styling Ideas (and Tips for Buying Online)

I recently decided to splurge on a pair of Dr. Martens 1460 boots and I’m sooo glad that I did! The styling possibilities are pretty much endless with a classic boot like the 1460’s and the quality of Dr. Martens is unbeatable.
I decided to purchase my boots online (not a big surprise, I’m an online shopper to the core) and I did some thorough research regarding sizing and a reputable online seller before I made a final decision. I researched sizing because I read some reviews that the sizing is tricky. And because DrMartens.com did not sell the color I wanted, I did my research on who I could trust that did.
I’m a pretty true size 9 in shoes so I decided to weigh out the tricky sizing reviews I read and go for my regular size 9. I’m glad I did because they fit perfectly! If you normally wear a whole size in shoes and are struggling with which size may be best for you, I suggest going with your regular size. Dr. Martens are only sold in whole sizes, no half sizes are available (hence the trickiness in sizing for people) so if you are a true half size in shoes, I suggest sizing down. If anything, my boots may have a little extra room in them, so sizing down if you’re a half size may be a good idea for you.
Any color you choose with these boots is a win in my opinion, but as soon as I saw Cherry Red Arcadia, my heart was set on them. Because DrMartens.com did not have Cherry Red Arcadia available for sale, I decided to buy from Amazon.com. They have a wide array of colors available and sell them for retail price or cheaper. They also offer free shipping. Sold! Here’s a link if you wanna go with Amazon:
Dr. Martens Women’s 1460 Originals 8 Eye Lace Up Boot
Docs look so great on girls in a variety of outfits, I mean it when I say the possibilities are endless! I decided to take some simple pieces to give you a few ideas to try. Shorts, dresses, skirts, skinnies, in whatever color.. Rock any of them with docs and it’s a fashion win.

 Top: Forever21Shorts: Forever21
Enter the Wu…

Top: Hot Topic (was a regular tee, I cut it into a tank top)
Jeans: Express

 I love the subtle red of Cherry Red Arcadia! It’s much lovelier in person, really.


Try a floral print dress or skirt.
Dress: Forever21 Bracelets: Forever21

I’d also love to share some inspirational Doc styles worn by Jessica Alba. She’s wearing Cherry Red Smooth. I love how she added socks with the second look. Definitely must try.

<3
DIY Tank Tops

You’ve probably heard someone say before that they’d die without music. That their soul would be empty without music. That their heart beats for music. Maybe you think they’re weird for feeling that way. If you do, then shooot, you’re gonna think I’m weird because that’s how I feel about music. I’m obsessed with it, I’m in love with it. Hell, maybe you feel the same way and you totally get me right now and we’re like, connected and stuff. 😉
I’m pretty eclectic when it comes to my musical preferences. My favorite genres include metal, rock, and hip hop, but I really could go on and on.. Deftones, Hieroglyphics, Slayer, Atmosphere.. Don’t even get me started.
When I was younger, I wore band shirts more than I wore regular tops. And when I was wearing them, they didn’t really make them in girl styles like they do now. But I’ve realized two things about the girl style band shirts: they are usually made with bands I don’t care for and if they are made with a band I like, I don’t even really care for the style of the shirt anyway. I prefer taking a men’s style shirt and cutting it into a tank top. It’s a pretty “trendy” look that has always been worn but it’s been picking up some popularity. Maybe celebrities like Kat Von D have helped progress that style. Either way, I dig the way it looks.
Today I wanted to cut my Death Row shirt that I’ve had for a while. (For the record, I like Biggie better. Don’t hate. I mean it. Don’t. Hah!)

I purchased this cool guy at Hot Topic a couple years back on clearance, but I’ve never liked the way it fits. It makes me feel like this when I wear it:
 It’s kinda tight around the neck and I think the sleeves just look blah. So, I’m going to cut it to look all nifty and I’ll show you how easy it is to do it. All you’re going to need are a pair of scissors. If you don’t own fabric scissors, then use kitchen scissors. I’ll be using kitchen scissors today.
I have no specific method to doing this to shirts other than trying to cut it somewhat evenly. I think what makes self-cut tees look cool is the fact that it’s not cut perfectly. That and if the edges are frayed a bit, which will happen naturally.
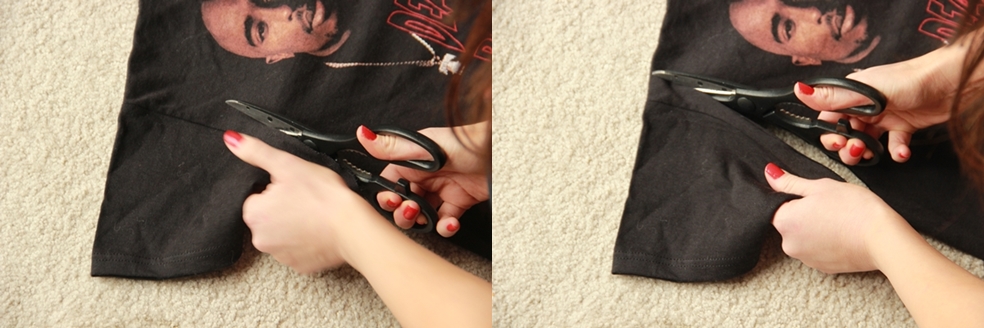
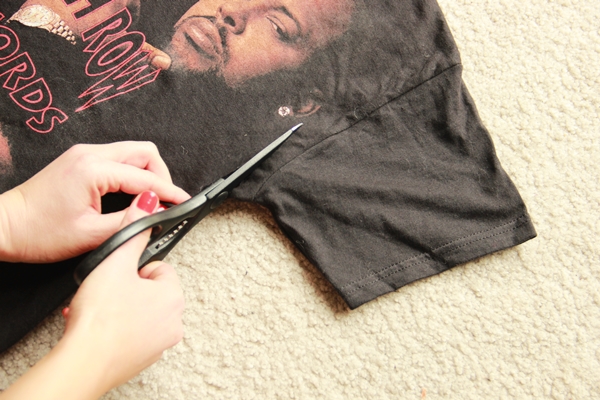 I make sure when I cut the sleeves that I am completely removing the seams that become the sleeve. Pretty easy. Above you can see that I’m not cutting that far past the seam. That’s because I like to start there, try it on, and then decide how much further I want to go from there.
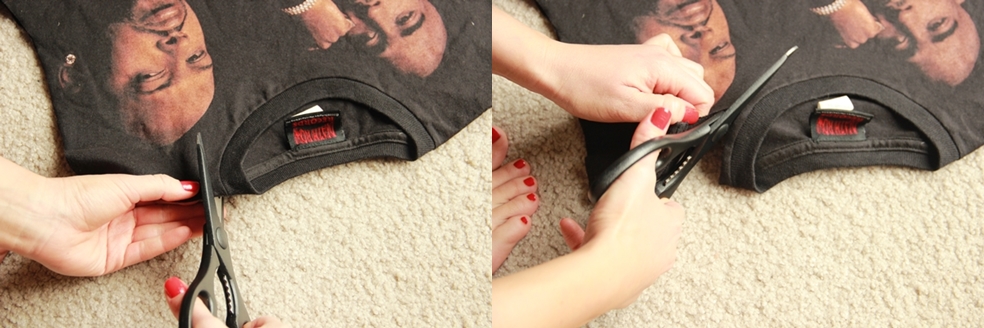
 After I cut off each sleeve, I go for the collar.
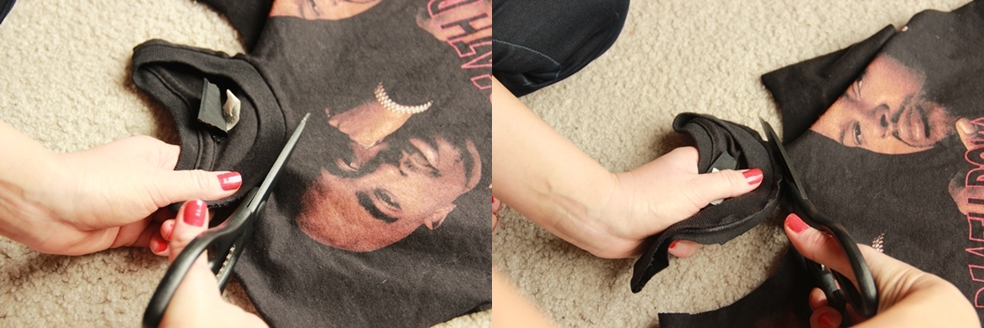 Now I have no sleeves to the shirt and the collar is cut off. I tried it on and now I want to take the sleeves in even a little further..

It took me about 5 minutes to do the above and now I’m finished! Awww yeah, I’m loving this end result!

I’ve also cut up a few other tees in the past and I wanted to show you those as well. One I’ve cut much skinnier on the sleeves than the Death Row shirt above and the other I kept as a t-shirt style but tried to make it a more feminine fit.

Here’s my MJ tee! Eee hee!
 (Excuse my nasty hair. It was a long day!)
If you decide to cut up a tee, whether it’s a band shirt or not, show me your end result!! I’d love to see. Also, if you have any suggestions as to how you do this differently, I’d love for you to share. <3
Put on some tunes and happy t-shirt cutting!!
Too easy, too yummy, so healthy: Tomato Basil Soup
Tomatoes. If you’re not incorporating them into your diet, you should consider adding them in somewhere. Grape (or cherry) tomatoes are an excellent addition in a salad, sliced tomato is an easy addition in a sandwich or burger, or you can try making tomato soup to really get a heavy dose of lycopene.
Do you know what lycopene can do for you?
Lycopene is well known specifically to help prevent many forms of cancer. It also aids in the prevention of many diseases and illnesses.
Check it out!
- Lycopene stops LDL cholesterol from being oxidized by free radicals and in turn from being deposited as a plaque (a fatty deposit inside an arterial wall) which narrows and hardens the arteries.
- Aids in the prevention of diabetes, osteoporosis, age related macular degeneration, and cataracts
- Helps keep skin looking younger by slowing down signs of aging
- Acts as an internal sunscreen and protects your skin from sunburn
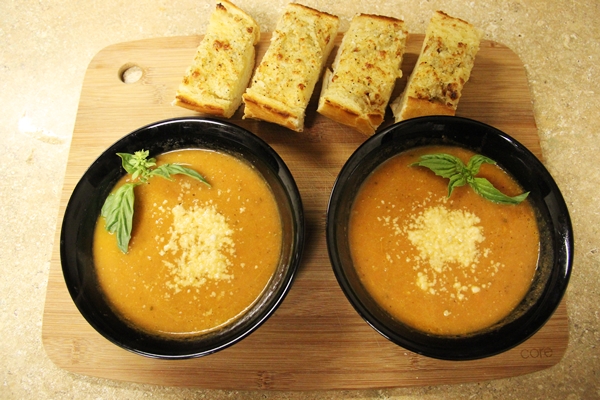
One of my favorite ways to incorporate lycopene into my life is through an easy and healthy tomato soup recipe. It’s so delicious and full of flavor, I think you’re going to have a difficult time believing that it’s simply tomatoes, onion, garlic, basil, broth, and a few spices. You also won’t believe that all you gotta do is roast the veggies and basil with the spices dashed on top and then puree with some broth. But, it’s true!
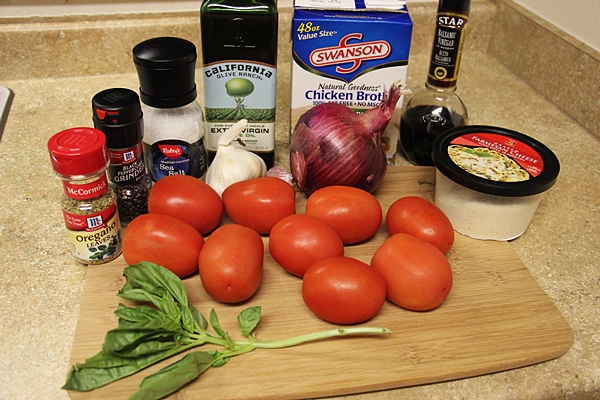
Here are the ingredients and the directions. Go on, make it. Discover this lycopene gem for yourself.
Makes 6-8 servings.
Ingredients:
2 lbs plum (roma) tomatoes
8-10 garlic cloves, peeled and whole
1/2 medium red onion
1 tablespoon olive oil
1 tablespoon balsamic vinegar
2 teaspoons oregano (I use dried oregano, you can also use 2
sprigs oregano, remove leaves from stem)
6 basil leaves
1/4 teaspoon salt
1/2 teaspoon pepper
2 cups fat-free, low sodium chicken broth
Parmesan cheese, shaved or grated (optional)
Directions:
1. Pre-heat your oven to 375 degrees.
2. Cut your tomatoes in half and place them in a shallow baking dish cut side down.
3. Add onion pieces, garlic, oregano, basil, salt, and pepper to the dish.
4. Drizzle vegetables with olive oil and balsamic vinegar.
5. Bake for 45 minutes.
6. Place roasted vegetables in food processor or blender and puree. **Add all the leftovers that are in the dish (the juices and spices) into your food processor or blender as well. Slowly add broth until soup has desired consistency. Continue blending until smooth.
7. Garnish with parmesan cheese if desired.
My go to product for this recipe is my wonderful little food processor, for without him this recipe would not be possible. Thank you parsley colored little buddy. I kinda sorta love you thiiiiiiiiiiiiiiiiiiiiiiiiiiiiis much!! *opens arms as wide as possible*
Cuisinart DLC-2ABC Mini-Prep Plus Food Processor, Brushed Chrome
Step by step photos:
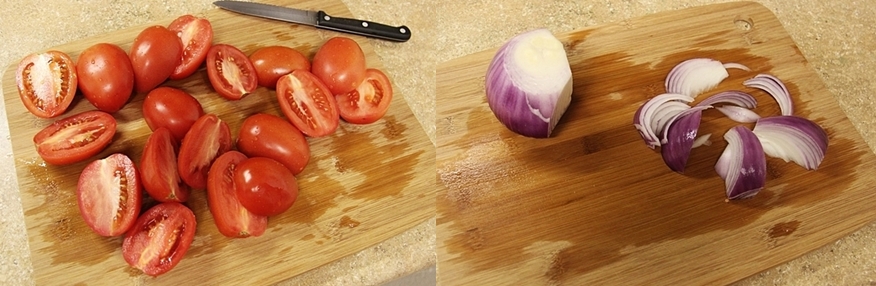 Cut your tomatoes in half and chop up half a red onion into several pieces.
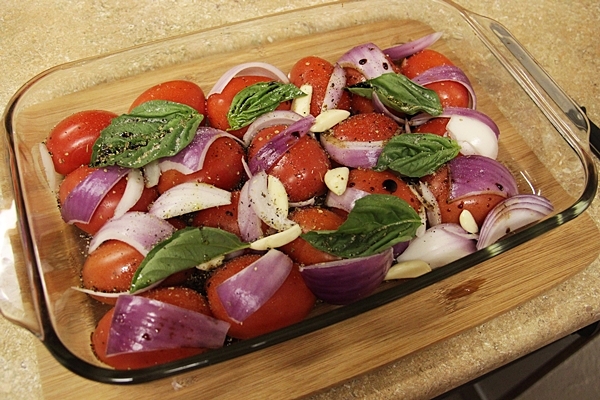 Add tomato cut side down into a shallow baking dish and add onion, garlic pieces, oregano, basil, salt, and pepper to the dish.
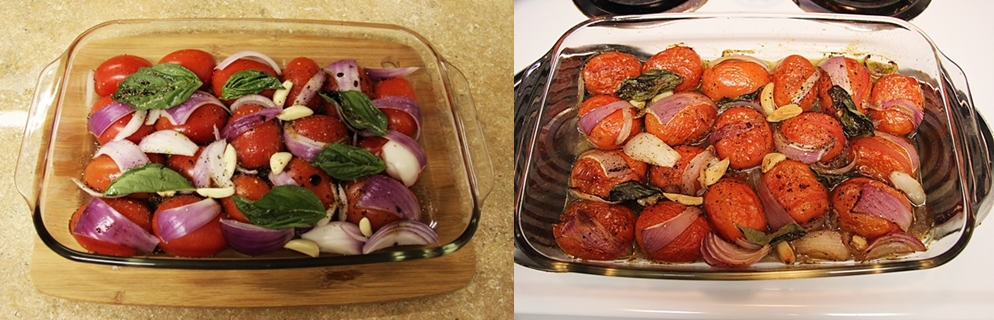 Pop that baby in the oven for 45 minutes at 375 degrees.
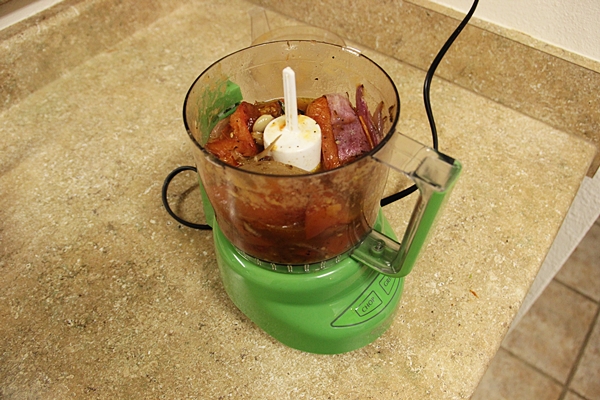 Place your roasted veggies into a food processor or blender and begin to puree. Slowly add the chicken broth until you get the desired consistency. I add the full 2 cups. Puree it all until it’s smooth.
It’s that simple for such a luxurious result. Go on now, try it!
Healthy, Easy, Simple: Crockpot Turkey Chili
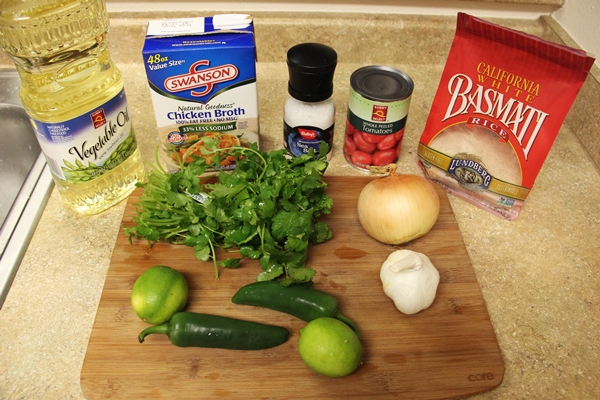
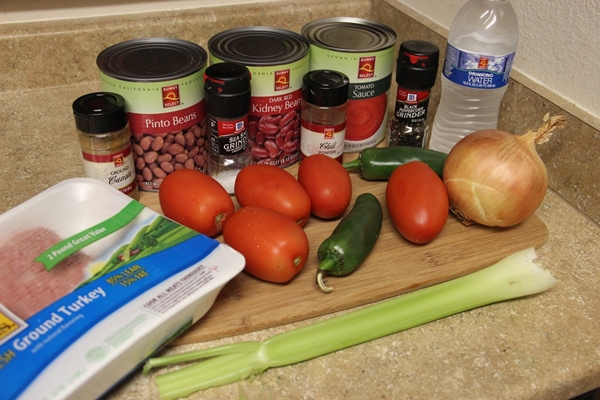 As you can see, this turkey chili (that goes in the crock pot! woo hoo!!) has pretty simple ingredients. You’ve got your spices, beans, tomato sauce, veggies, and ground turkey. The very first time I made this, I actually used ground beef. While that was yummy, as soon as I ate the first spoonful, I wondered why the hell didn’t I use ground turkey? It’s just as yummy and if you buy lean ground turkey, there are benefits to eating it versus ground beef.
When I visited Save Mart to buy my ingredients, they only had 85% lean 15% fat left, so that’s what’cha see in the photo above. I have made it with 99% lean and 1% fat, which is what I highly recommend. The spices and flavors that are absorbed into the turkey while it’s in the crock pot adds so much flavor, you just simply will not regret using ground turkey versus ground beef.
Here is the nutritional information on the 99/1 ground turkey:
- Serving size 112g (4oz)
- Calorie 120
- Calories from fat 15
- Total fat 1.5g
- Saturated fat 0.5g
- Cholesterol 65mg
- Sodium 60 mg
- Total Carbohydrate 0g
- Protein 27g
Excellent source of protein with only 1.5g of fat and only 0.5g of saturated fat. If you watch Dr. Oz at all, he advises to look for foods that have 4g of saturated fat or less. We’ve got a winner!
So, now that you’re convinced to use ground turkey when making your chili (yeeahhh, you’re convinced *squints eyes, nods head*), onto the easy steps you’re gonna take to make this healthy and simple dinner for you and your loved ones.
Makes 12 servings.
Ingredients:
2 lbs lean ground turkey
1 (29 ounce) can tomato sauce
1 (29 ounce) can kidney beans (with liquid)
1 (29 ounce) can pinto beans (with liquid)
1 cup diced onion (1 medium onion)
1/2 cup diced jalapeno (2 jalapenos)
1/4 cup diced celery (1-2 stalks)
5 Roma tomatoes, chopped
3 teaspoons cumin powder
3 tablespoons chili powder
1 1/2 teaspoons black pepper
1/2 - 1 teaspoon salt
2 cups water
Directions:
1. Brown the ground turkey in a large pan.
2. Chop the onion, jalapeno, celery, and tomatoes. ***Important note*** Make damn sure you use gloves when chopping jalapeno! Unless you thoroughly enjoy a burning sensation all over your hands for a day.
3. Add the chopped veggies, browned ground turkey, canned items, spices, and water into the crock pot.
4. Cook on high for 3 hours, stirring at least once every hour.
That’s it  I love that this is healthy and filling. Plus! Between my boyfriend and I, this lasts us about 3 days. Pluuuus, it tastes just as good on that third day as it does the first day.
Enjoy!
Step by step photos:
 Brown your ground turkey in a large pan.
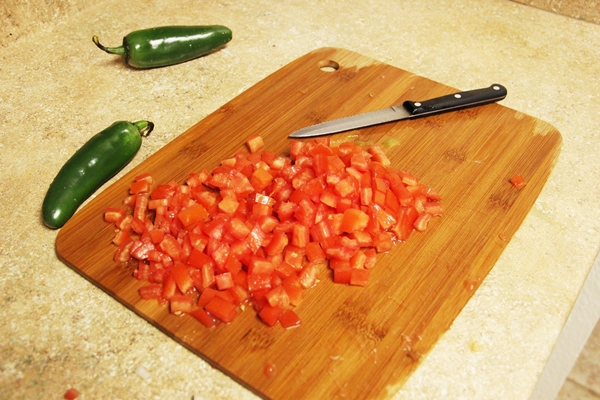 Chop your veggies.
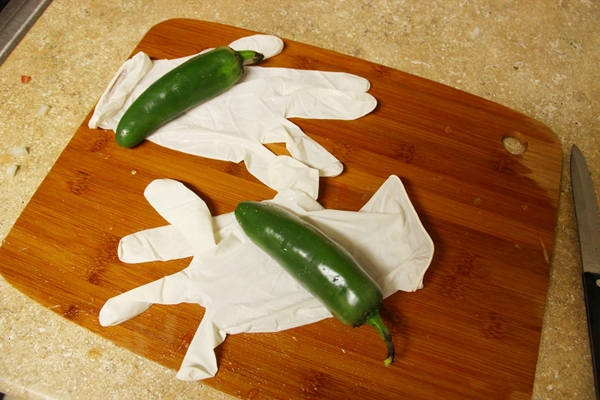 Make sure you use gloves when chopping jalapeno!! It is not fun dealing with the burning sensation that accompanies chopping hot schtuff with your bare hands. You can use the link I’ve provided to buy yourself a box of a bunch of gloves. It’s cheap and worth it!
Safetouch Powder Free Latex Exam Gloves, Non-Sterile, Medium
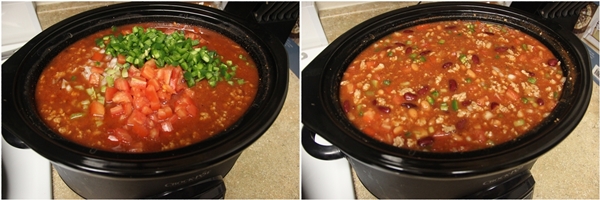 Add your chopped veggies, browned ground turkey, canned items, spices, and water into the crock pot. In absolutely no particular order Turn your crock pot on high for 3 hours and stir every half hour to every hour.
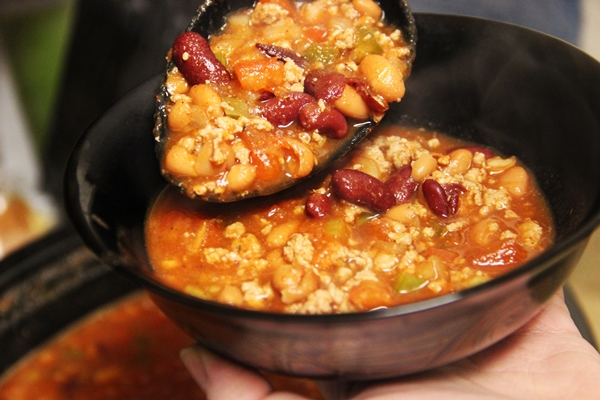 And look what you have here! Some healthy turkey chili! Enjoy, you awesome people, you.
Authentic Spanish Rice (It’s not difficult to make!)
Ahhh, Spanish rice. Or rice, as a “Mexican food enthusiast” would call it. Hah. Check out what wikipedia says about “Spanish” rice:
“Although called “Spanish rice”, this dish is unknown in Spain.The term “Spanish rice” is not used by Mexicans or Mexican food enthusiasts, and its use probably stems from the fact that the Spanish language is spoken in Mexico; the dish is usually simply referred to as arroz (“rice”) in Mexico.”
My head is spinning from too many quotation marks. Wooo! Okay, you’ll only need nine (ten if you count squeezing some limes onto your rice) ingredients to make this tasty treat. Gather your blender or food processor and let’s do this!
Makes 8-10 servings.
Ingredients:
12 ounces canned tomatoes
1 medium white onion (chopped into several chunks)
3 medium jalapenos (minced)
2 cups long grain white rice
1/3 cup canola oil
4 minced garlic cloves
2 cups chicken broth
1 teaspoon salt
1/4 cup fresh cilantro, minced
1 lime (optional)
Directions:
1. Preheat your oven to 350 degrees.
2. In a blender or a food processor, add your canned tomatoes and your onion. Process until pureed. Transfer mixture to measuring cup and reserve exactly 2 cups (discard any excess).
3. Mince your garlic and set aside in a bowl.
4. Using gloves, mince your jalapeno and remove the seeds. Set aside in the same bowl as the garlic.
5. Mince the cilantro and set aside in its own bowl.
6. ***EXTREMELY IMPORTANT STEP – Rinse your rice in a fine mesh strainer!*** Rinsing your rice will remove the starch so that it is fluffy and not sticky. Place rice in a fine mesh strainer and rinse under cold running water for about 3 minutes. Shake rice vigorously to remove excess water.
7. Heat oil in a large pan or Dutch oven with tight fitting lid over medium-high heat about 2 minutes. Drop a few rice grains in – if they sizzle then you’re ready to start. Add the rest of your rice and fry, stirring until rice is light golden and translucent (about 7 minutes).
8. Reduce heat to medium and add your garlic and minced jalapenos. Stir constantly for about 2 minutes.
9. Stir in broth, the pureed mixture, and salt. Bring to a boil.
10. Cover the pan with a tight fitting lid and transfer the pan to the oven. Bake for 35 minutes – until the liquid is fully absorbed. At 15 minutes, make sure to stir well.
11. Stir in the minced cilantro and squeeze some lime juice to taste (optional).
Step by step photos:
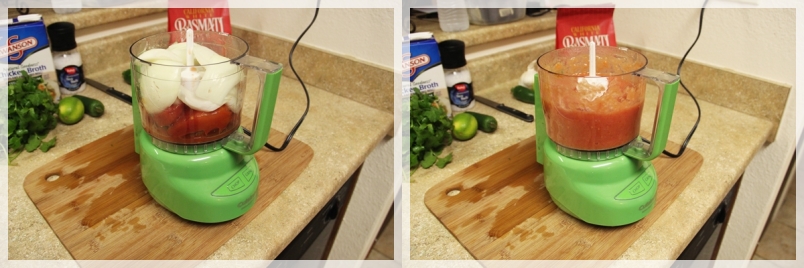 In a blender or food processor, add your tomatoes and chopped onion. Note: You can use fresh tomatoes for this recipe of course, but you just have to make sure that they are verrry ripe! Normally where I shop, the tomatoes are mostly relatively firm. Your rice simply will not taste its best if you use a more firm tomato. For this reason, I go with canned.
Also, I absolutely love my little Cuisinart food processor that you see above. You’re probably going to hear me talk about this fellow a lot. I live in an apartment and my kitchen space is pretty small. I simply do not have room for the average person’s appliances.. I need compact items! This fellow does the job perfectly. Two settings, 3 pieces to clean, fits perfectly in my little pantry. Here’s a link to him if you wanna check him out for yourself.
Cuisinart DLC-2ABC Mini-Prep Plus Food Processor, Brushed Chrome
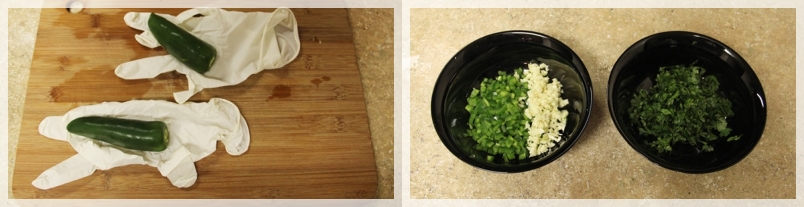
Next, chop your garlic, jalapeno, and cilantro. I put my garlic and jalapeno in the same bowl because I’ll be adding them at the same time.
I’ve said it before and I’ll say it again, USE GLOVES when chopping hot stuff! I can say from personal experience that not using gloves and chopping chiles and peppers is a baaaad move, yo. My hands were in a world of hurt and no olive oil, rubbing alcohol, or any other remedy really truly took the pain away. That was not a fun evening for removing my contacts, either. Wearing gloves is all you’ll need to do to avoid this world of hurt and you can buy a bunch of them for super cheap. Here’s a link to some:
Safetouch Powder Free Latex Exam Gloves, Non-Sterile, Medium
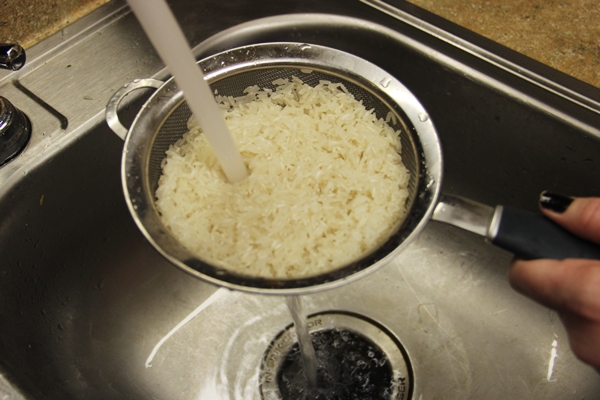
This next step may seem pointless, but it is not. Rinsing your rice with cold water in a fine mesh strainer for a few minutes (until it runs mostly clear) will remove the starch from it. Removing the starch will allow the rice to become fluffy when you cook it, instead of sticky. Sticky rice is great for some recipes, but not for this one.
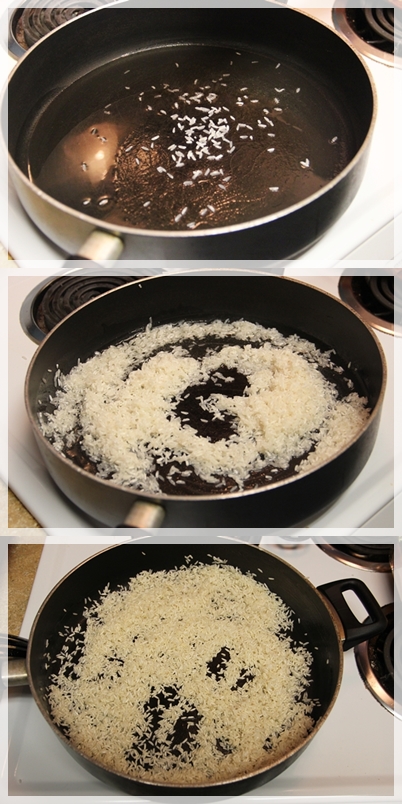
Next, heat some of the vegetable oil up in a large pan on medium-high heat for a few minutes. Add in a few grains of rice to see if they sizzle.. If they do, then you’re ready to go. Add in the rest of your rice and fry it for about 7 minutes. It should become light golden in color (the last picture above).
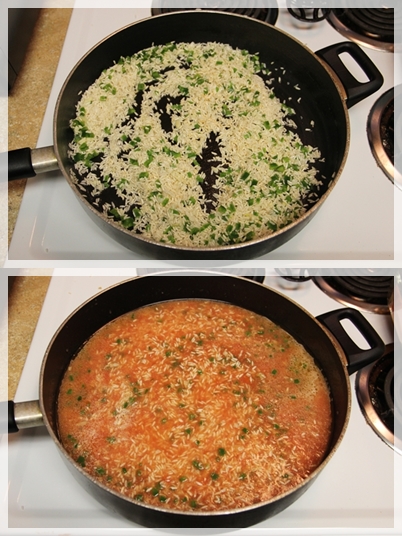
Next, lower your heat to medium and add in your minced garlic and jalapeno and stir that for a couple of minutes. Then, add your broth, pureed mixture, and salt. Bring that baby to a boil.
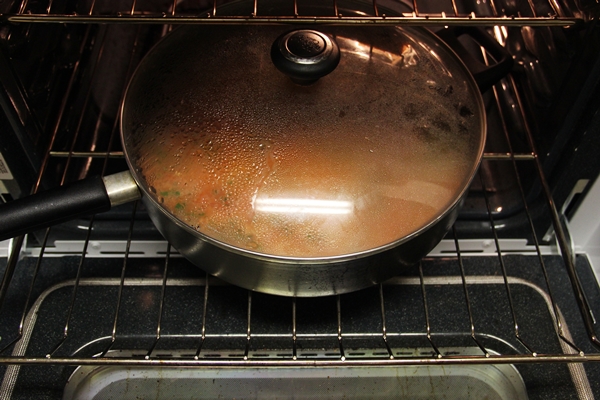
Cover up your pan of just boiled delicious mixture with a tight fitting lid and put it in youroven (set at 350 degrees). It should be in there for approximately 35 minutes, but make sure that at about 15 minutes you take the lid off, stir it up, and put it right back in there.
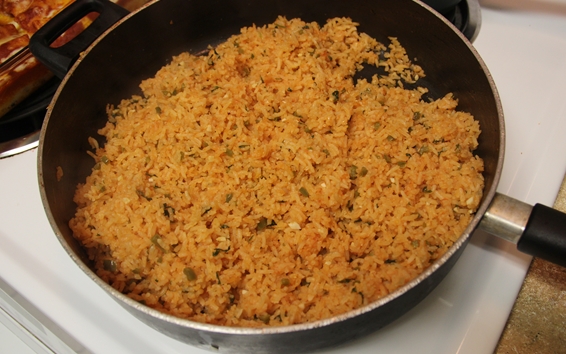
Once that half hour is up, remove that bad boy from the oven and longingly gaze at the beautiful rice you just made. Yes, you made this! Aren’t you amazing?? Then scarf it down with some chicken enchiladas. Then do a jig because there’s a delicious party is in your tummy.